Timing Company Integration
RaceLookup integrates with leading timing companies to streamline your race management workflow. Connect your timing system to automatically sync participant data, bib assignments, and race results.
Available Integrations
 RaceResult
RaceResult is a comprehensive race timing and results platform. Our integration allows you to:
- ✅ Automatic Participant Sync: Push registered participants from RaceLookup to RaceResult
- ✅ Bib Number Management: Sync bib assignments between platforms
- ✅ Results Import: Pull race results from RaceResult back to RaceLookup
- ✅ Contest/Category Mapping: Map your race categories to RaceResult contests
- ✅ Real-time Updates: Keep both systems in sync throughout your event
Benefits of Timing Integration
Streamlined Workflow
- No Manual Data Entry: Eliminate the need for spreadsheets and manual data transfer
- Automatic Updates: Changes sync automatically between platforms
- Reduced Errors: Minimize data entry mistakes and inconsistencies
Better Participant Experience
- Faster Results: Results appear on RaceLookup immediately after import
- Accurate Data: Single source of truth for participant information
- Seamless Experience: Participants see consistent information across platforms
Time Savings
- Automated Processes: Set it up once and let it work
- Background Processing: Large syncs happen automatically
- Less Manual Work: Focus on your event, not data management
Getting Started
Follow these exact steps to set up your timing company integration:
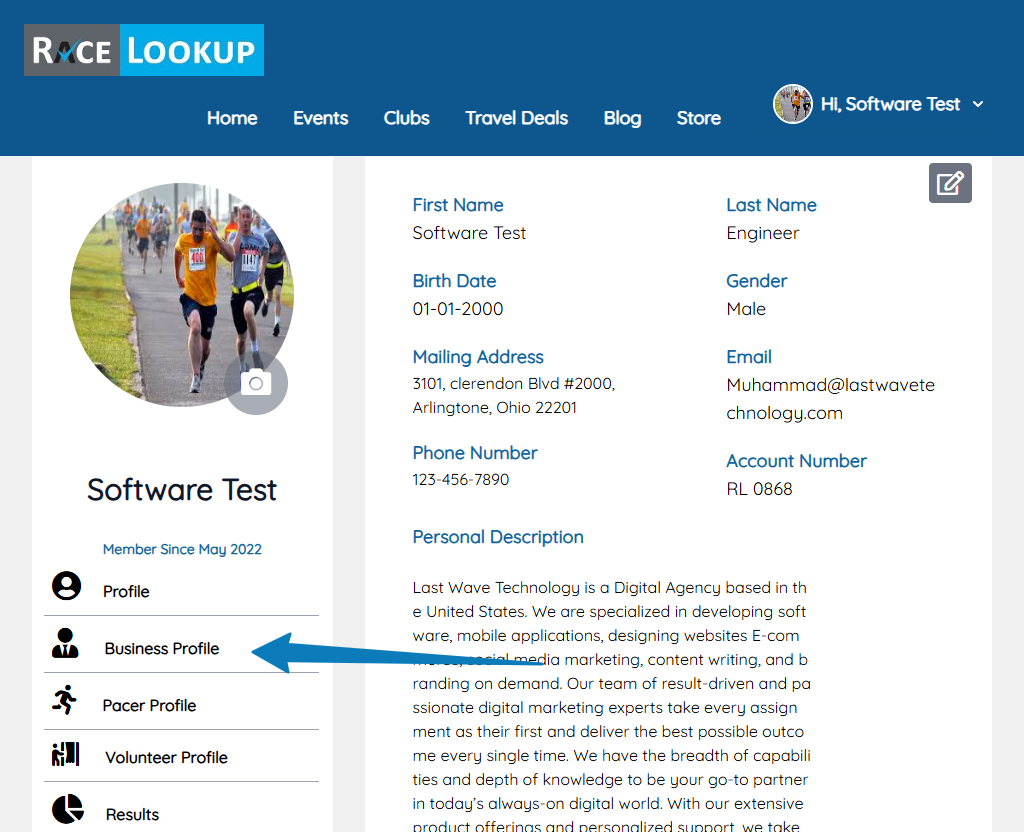
Step 1: Navigate to Business Profile
- Log in to your RaceLookup account at https://racelookup.com/login
- After logging in, you'll be on your Dashboard at https://racelookup.com/dashboard
- In the left sidebar, click on "Business Profile" (the link with the business icon)
- Direct URL: https://racelookup.com/business/profile
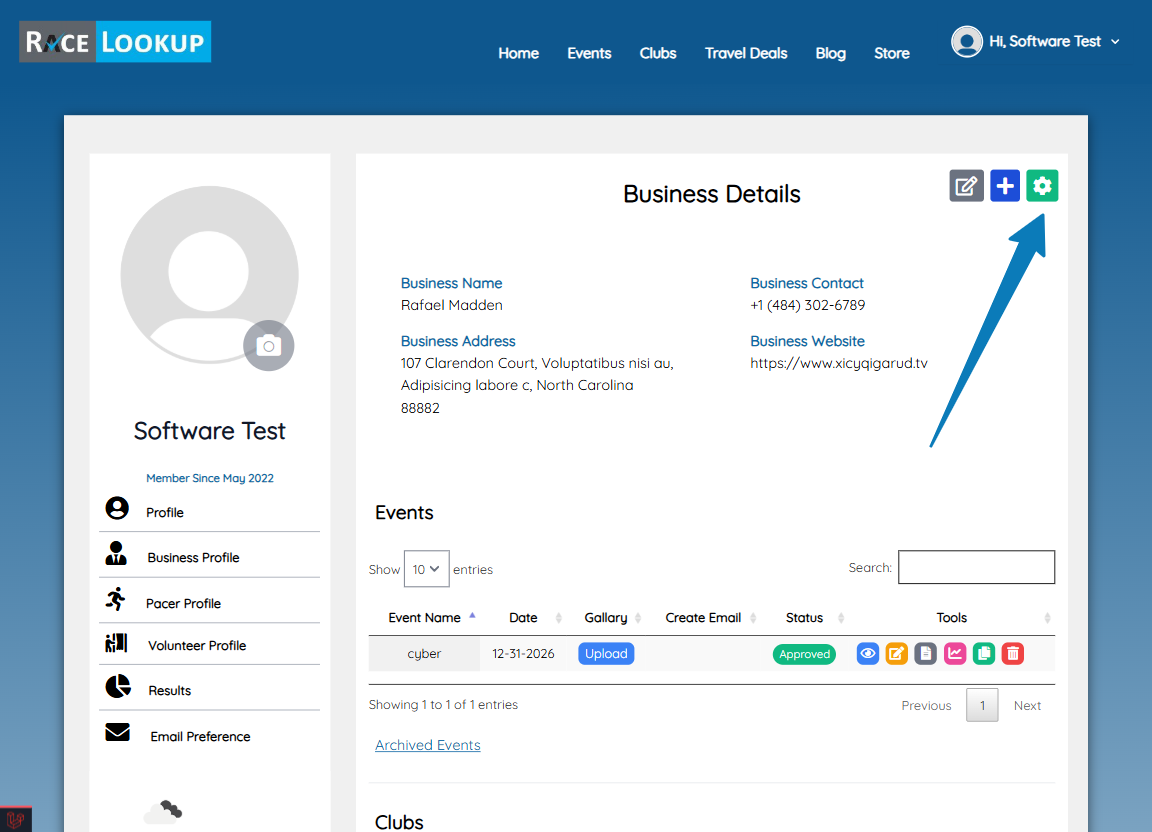
Step 2: Access Timing Companies Settings
- On the Business Profile page, look at the top right corner of the page
- You'll see three icons in a row:
- Edit icon (pencil) - for editing business details
- Plus icon - for managing member access
- Gear icon (settings) - for timing company settings
- Click on the Gear icon (⚙️) to access Timing Companies
- Direct URL: https://racelookup.com/business/timing-company
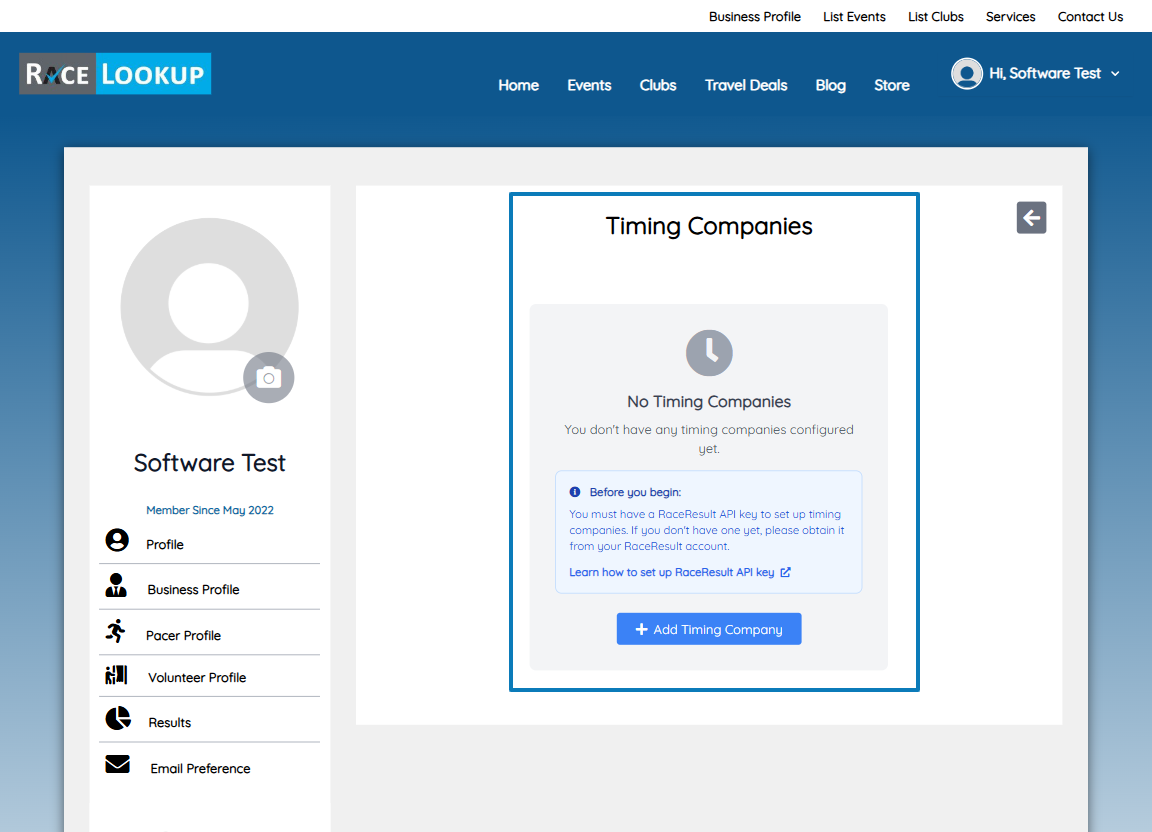
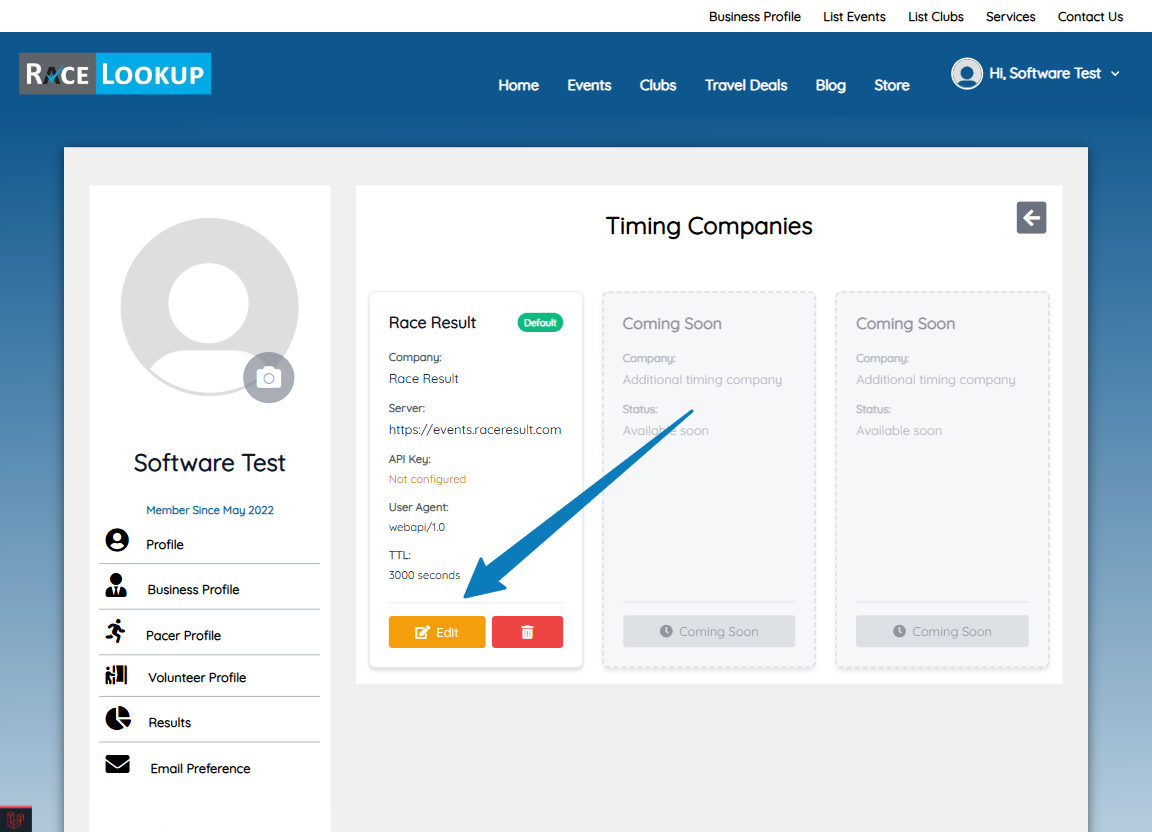
Step 3: Add or Configure Timing Company
On the Timing Companies page, you'll see one of two views:
If you have no timing companies configured:
- You'll see a message: "No Timing Companies"
- Click the "Add Timing Company" button (green button with plus icon)
- This will automatically create a default RaceResult timing company and take you to the edit page
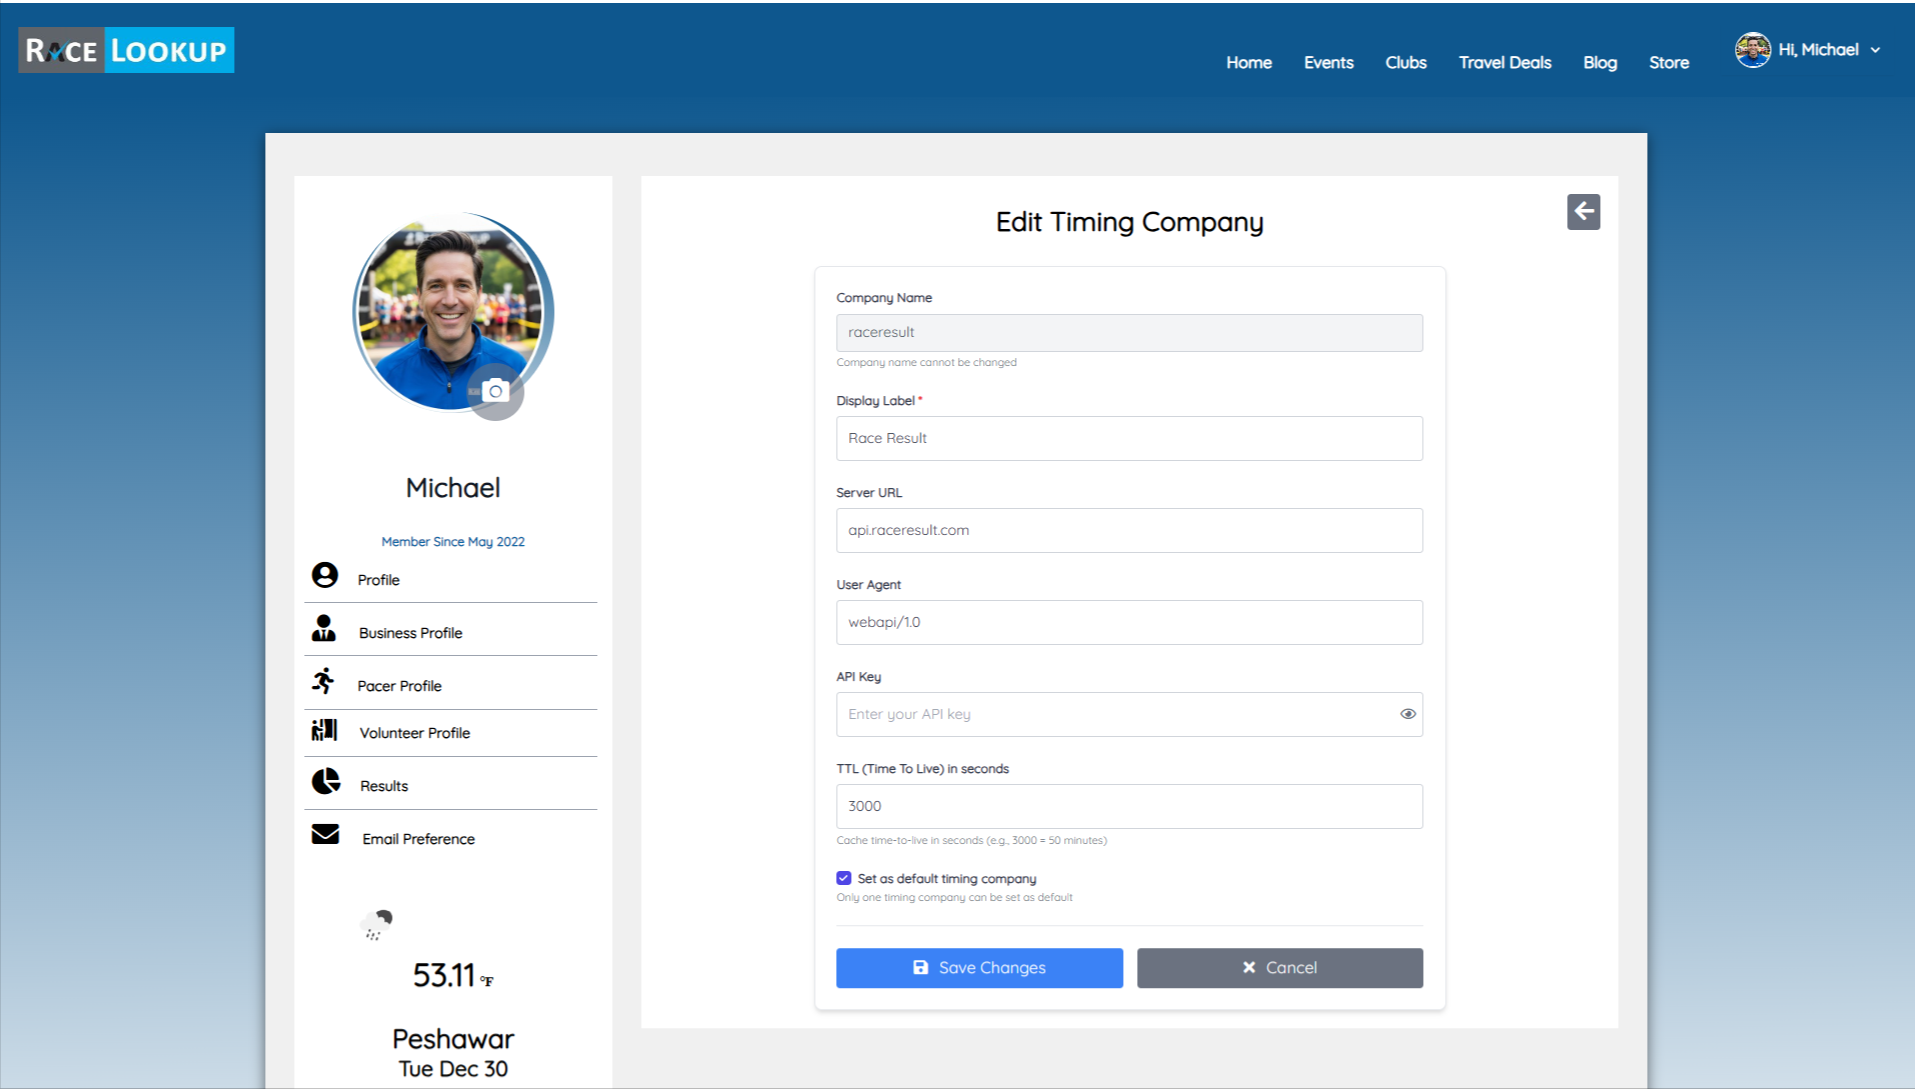
Once you're on the Add Timing Company page, you'll see the configuration form with all the fields you need to fill in. This form allows you to set up your timing company integration settings.
If you already have timing companies:
- You'll see cards for each configured timing company
- Click the "Edit" button on the card for the timing company you want to configure
- You'll be taken to the Edit Timing Company page where you'll see the configuration form
- URL Pattern:
https://racelookup.com/business/timing-company/{id}/edit
Step 4: Configure Timing Company Settings
On the Edit Timing Company page, fill in the following fields:
Company Name
- Field Type: Read-only (disabled)
- Value: Automatically set to "raceresult"
- Note: This field cannot be changed
Display Label *
- Field Type: Required text input
- Default Value: "Race Result"
- Purpose: This is the name that will be displayed in your interface
- Example: "Race Result", "My RaceResult Account", etc.
Server URL
- Field Type: URL input (optional)
- Default Value:
https://events.raceresult.com - Placeholder:
https://events.raceresult.com - Purpose: The base URL for your RaceResult API server
- Note: Leave as default unless you have a custom server URL
User Agent
- Field Type: Text input (optional)
- Default Value:
webapi/1.0 - Placeholder:
webapi/1.0 - Purpose: The user agent string used for API requests
- Note: Leave as default unless instructed otherwise
API Key
- Field Type: Password input (required for functionality)
- Placeholder: "Enter your API key" (if new) or "Enter new API key to update (leave blank to keep current)" (if updating)
- Purpose: Your RaceResult API key for authentication
- How to get it: See detailed step-by-step instructions: How to Generate an API Key in Race Results
- Security: The field has an eye icon (👁️) to toggle visibility
- Note: If updating an existing timing company, leave blank to keep the current API key
TTL (Time To Live) in seconds
- Field Type: Number input (optional)
- Default Value:
3000 - Purpose: Cache time-to-live in seconds
- Example: 3000 = 50 minutes
- Note: This controls how long API responses are cached
Set as default timing company
- Field Type: Checkbox
- Default: Checked (for the first timing company)
- Purpose: Only one timing company can be set as default
- Note: The default timing company will be used automatically for event integrations
Step 5: Save Your Configuration
- Review all your settings
- Click the "Save Changes" button (blue button with save icon)
- You'll be redirected back to the Timing Companies index page
- A success message will confirm your changes have been saved
Step 6: Connect Your Event to Timing Company
After configuring your timing company:
- Navigate to your event's registration or management page
- Look for timing company integration options
- Select your configured timing company
- Link your RaceLookup event to your RaceResult event
- Begin syncing participants and results
Navigation Summary
Complete Navigation Path:
- Login → https://racelookup.com/login
- Dashboard → https://racelookup.com/dashboard
- Business Profile → https://racelookup.com/business/profile
- Timing Companies (via Gear icon) → https://racelookup.com/business/timing-company
- Edit Timing Company →
https://racelookup.com/business/timing-company/{id}/edit
Quick Access:
- Direct link to Timing Companies: https://racelookup.com/business/timing-company
After Setup
Once you've configured your timing company:
Verify Your Configuration
- Return to the Timing Companies page: https://racelookup.com/business/timing-company
- You should see your timing company card displayed
- The card will show:
- Company name (e.g., "Race Result")
- Display label
- Status indicators
- Edit and Delete options
Using Your Timing Company
After configuration, your timing company will be available for:
- Event Integration: When creating or editing events, you can link them to your RaceResult account
- Automatic Participant Sync: Registered participants will automatically sync to RaceResult
- Bib Assignment Sync: Bib numbers assigned in RaceLookup will sync to RaceResult
- Results Import: Race results from RaceResult can be imported back to RaceLookup
Managing Multiple Timing Companies
You can configure multiple timing company accounts:
- On the Timing Companies page, click "Add Timing Company" to create additional accounts
- Each timing company can have different:
- API keys
- Server URLs
- Display labels
- Only one timing company can be set as default at a time
- To change the default, edit a timing company and check the "Set as default timing company" checkbox
Troubleshooting
Common Issues
Issue: "No Timing Companies" message appears
- Solution: Click the "Add Timing Company" button to create your first timing company
Issue: API key not working
- Solution:
- Verify your API key is correct in your RaceResult account
- Check that the Server URL matches your RaceResult server
- Ensure your API key has the necessary permissions
Issue: Cannot set timing company as default
- Solution: Only one timing company can be default. Uncheck the default setting on other timing companies first
Issue: Changes not saving
- Solution:
- Ensure all required fields (marked with *) are filled
- Check your internet connection
- Try refreshing the page and saving again
Need Help Generating Your API Key?
For detailed step-by-step instructions with screenshots on how to generate your RaceResult API key, see our dedicated guide:
How to Generate an API Key in Race Results
This guide includes:
- Step-by-step instructions with screenshots
- How to navigate to the API Keys section
- How to create and configure your API key
- Important security notes
Support
Need help with timing company integration?
Ready to integrate? Access Your Dashboard → Business Profile → Timing Companies